Clip Studio Paint — The Photoshop Ex-Pat’s Guide
You don’t need a subscription to read today’s post!
This is a re-post from the Webcomics.com archive. If you’ve ever been curious about the kind of information, tutorials and advice that you’ll get as part of your subscription to Webcomics.com, this is a good example.
If you’d like to join the site, you can get a 12-month subscription for $30 — or you can get a one-month Trial for $5 … with no obligation after your 30 days expire. For less than three bucks a month, you can get a steady flow of information, tutorials and advice targeted towards your webcomic business — plus a private forum to discuss issues with other professionally minded cartoonists.
If you’re like many cartoonists, you learned Photoshop long before you learned any other image-manipulation software. As Clip Studio Paint continues to make converts out of us, I thought it would be useful to post a guide to manga Studio from the perspective of someone who, like myself, once saw all image-manipulation through the lens of Photoshop.
Many of the shortcuts, processes and commands are identical. But there are some old habits that you’ll need to dispatch — and still other new tricks to learn that were never possible before.
Deja vu
Manga Studio seemed to go out of its way to build a familiar work environment. Layers (and folders of layers) work exactly the same as they do in Photoshop. Many of the keyboard shortcuts are the same. Your muscle memory will not be wasted, for the most part.
P, not B
Although many of the keyboard shortcuts are identical, Photoshop ex-pats who are used to hitting the B key to access their pencils and brushes (including inking brushes that mimicked pens) will now find that the need to remember to hit P instead.
In Manga Studio, “P” toggles between the pencil tool and the pen tool — where you will probably do most of your drawing. “B” toggles from the brush tool to the airbrush tool to the decoration tool.
R is still R, though
To rotate the canvas, you still use the R key. To snap back to the main view, double-click the rotate tool in the Manga Studio toolbar.
Image size and Canvas size
You’re used to looking for these under the Image menu in Photoshop. In Manga Studio, they’re under the Edit menu.
Presets are now Locks
In Photoshop, when you want to save a setting for a tool, you create a preset. The last preset you activate becomes the default for the next time you access that tool. You can create endless presets.
In Manga Studio, once you have a setting you’d like to keep, you will navigate to the tool’s submenu and click on the wrench icon. This “locks in” those settings for that sub tool — making it the default for when you access that tool next. Even when you quit the application and then re-open it, those settings are the established defaults.
You can always register different brush types and keep them in a library. But there’s only one default — the one you locked in with your wrench.
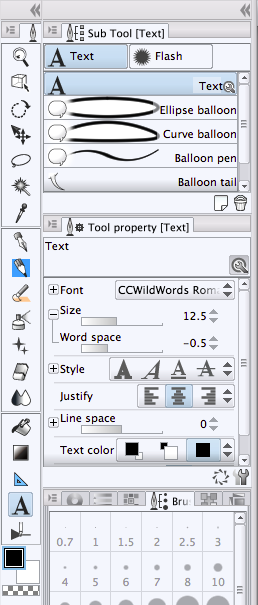
And you can lock in settings on nearly any tool — including the type tool. Once you’ve established a good font/size/leading* combination for your lettering, you can lock it in!
Manga Studio called leading “line space.” I’m just gonna look the other way on that one.
The Move tool is not the Operation tool (and sometimes, the Move Layer tool)
 Instead of a one-size-fits all curser at the top of the toolbox, Manga Studio splits the function into two tools — the Operation tool and the Move Layer tool.
The Operation tool looks like an arrow piercing a cube, and the Move layer tool is the second tool under the Operation tool, looking like an arrow in the upper, lefthand quadrant of a crosshairs.
If you want to move something, chances are, you want the Operations tool. However, if you want to move several items (on separate layers), you’ll want to select those layers and head for the Move Layer tool instead.
Transform
The Transform function is exactly the same. Only different.
In Photoshop, you would use Command-T, and then head over the to Edit menu and pull down to Transform. Then you can select Skew, Scale, Distort, Flip Horizontal and more.
In Manga Studio, starting off with a Command-T is a good way to start — if you’re doing Flip Horizontal. It’s right there in the Sub-tool menu.
But if you want to do another transform operation — such as a Skew or a Flip Vertical — skip the Command-T and go right for the Edit menu. Pull down to Transform and you’re good to go.
Fill Bucket
As I mentioned in an earlier post, you no longer need to set up a special Action to keep the fill bucket from leaving a ring around your fill. Manga Studio knows the score. And you can fine-tune the fill bucket even further in its sub-tool menu.
Filters
Photoshop wins in the filter category. The Manga Studio offering in this regard is lacking.
Manga-Studio-exclusive features
However, there’s a metric ton of features that Manga Studio offers that Photoshop can’t touch. If you haven’t experimented with the Perspective Rulers, the Line Correction tool, the posable models, the Draft layer settings or the way Manga Studio handles lettering and word balloons… then you have a lot to discover. (And I’m working on posts about each.)


Recent comments